- Need Diagnostic Guidance? Call Desk: +971 55 639 9463
- Expert Support: 8:00 AM – 10:00 PM (GST)

Reviewed by Karim Nasser (Master Diagnostic Technician · 20+ Yrs Exp) Updated: August 2026 | 9 Min Read

Turning the ignition key only to hear a rapid metallic clicking sound or facing a completely dark instrument cluster is one of the most frustrating experiences for any vehicle owner.
When a battery dies, most drivers immediately assume the battery itself has failed and rush to buy a replacement. However, over 40% of replaced automotive batteries are actually healthy units drained by an underlying parasitic draw (a module that refuses to go to sleep) or starved by an undercharging alternator. Installing a brand-new battery into a vehicle with an unresolved electrical drain will simply destroy the new battery within weeks.
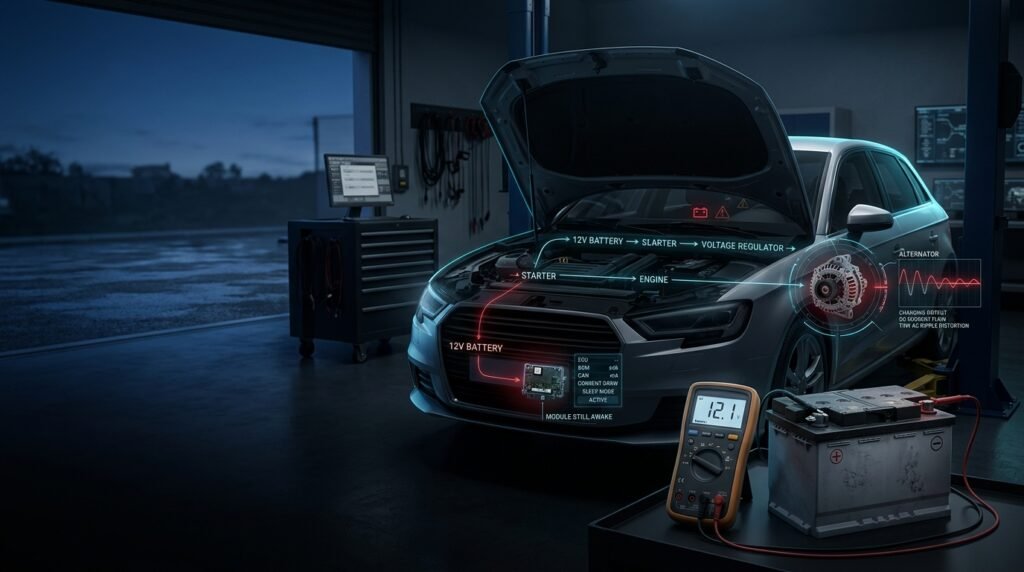
Never disconnect the negative battery terminal while the engine is running to "test if the alternator works." This outdated trick creates an immediate high-voltage inductive spike (load dump) up to 100 volts that can fry sensitive microprocessors across modern engine control units (ECUs), transmission modules, and airbag controllers. Always use dedicated conductance analyzers and digital multimeters for electrical testing.
Your vehicle’s starting and charging loop relies on three interdependent components:
12V Battery → Starter Motor → Engine Cranks & Runs → Alternator → Voltage Regulator → 12V Battery
The 12V Battery (Chemical Storage): Provides high Cold Cranking Amps (CCA) for 3 to 5 seconds to turn over the engine, while stabilizing voltage across electronic control modules.
The Alternator (Power Plant): Once the engine runs, the alternator supplies all electrical current to vehicle accessories and sends direct current back to recharge the battery.
The Ground Circuit (Return Path): Complete electrical loops require low-resistance chassis ground returns. High resistance on negative ground straps starves control modules, mimicking dead battery symptoms.
Before disassembling fuse boxes, cross-referencing your symptoms with the DriveSolve Car Diagnostic Navigator will compare your vehicle’s make and model against known network sleep cycle faults and charging system diagnostic trouble codes (such as P0562 for system voltage low or P0620 for alternator control circuit malfunction).
Step 1: Conduct a Dynamic Cold Cranking Amps (CCA) & Conductance Test
Measuring resting voltage with a basic voltmeter only tells you surface charge, not internal health. A sulfated battery can display 12.6 volts but collapse to 6 volts the millisecond the starter draws current.
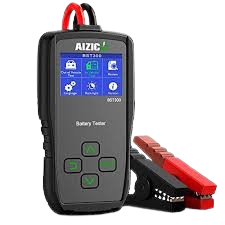
Connect a Digital Car Battery Load Tester and Cranking Analyzer directly to the bare lead battery posts (not over painted terminal brackets):
State of Health (SOH) > 80%: The internal plate structure and acid density are sound.
State of Health (SOH) < 50%: Internal lead plates are heavily sulfated or an internal cell bridge is broken. The battery cannot deliver rated cranking power and requires replacement.
Internal Resistance > 15 mΩ: High internal resistance indicates degraded active material; the battery will struggle in high summer heat or freezing winter temperatures.
Step 2: Measure Alternator Charging Voltage & AC Diode Ripple
Start the engine, turn on high beams, and set the AC blower fan to high. Place test leads across the battery terminals with the engine running at 2,000 RPM.
Normal Charging Voltage: 13.8V to 14.5V (Regulated charging state).
Undercharging (< 13.5V): Worn alternator brushes, glazed serpentine belt slipping under load, or failing electronic voltage regulator.
Overcharging (> 15.0V): Dangerously high voltage that will boil battery electrolyte and blow out delicate LED headlight controllers and ECU chips.
AC Ripple Test: Switch your multimeter to AC voltage mode. A reading above 0.05V AC (50mV) indicates a blown rectifier diode inside the alternator, which allows alternating current to leak into the DC bus, draining the battery even while driving.
Step 3: Recover Sulfated Cells with High-Frequency Pulse Desulfation
If a battery has sat completely drained below 10.5V, lead sulfate crystals harden over the plate surfaces, blocking chemical reaction channels and preventing standard alternators from accepting a charge.
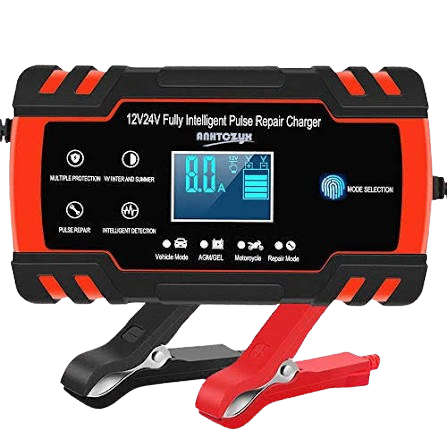
Connect an Automatic Smart Pulse Repair Battery Charger and Maintainer and initiate a desulfation repair cycle. The microprocessor sends high-frequency electrical pulses to dissolve micro-crystalline sulfur buildup back into the sulfuric acid solution, restoring charge acceptance and extending battery service life without boiling internal electrolyte.
Step 4: Execute the Step-by-Step Parasitic Battery Drain Test
If your battery and alternator test healthy but the car dies after sitting parked for 24 to 48 hours, an electronic module is remaining awake.
1. Turn off all lights, close all doors, and latch the hood switch with a screwdriver to simulate a locked vehicle.
2. Wait 20 to 30 minutes for all onboard computers (BCM, Infotainment, Telematics) to enter full deep-sleep mode.
3. Set a digital multimeter to DC Milliamps (mA) and place it in series between the negative battery post and the disconnected negative terminal clamp:
Normal Key-Off Sleep Current: 20 mA to 50 mA (0.02A – 0.05A).
Excessive Parasitic Drain: 150 mA to 1,500 mA+ (0.15A – 1.5A).
4. Pull interior and engine-bay fuses one by one until the current draw drops back to normal (< 50 mA). The circuit that drops the reading contains the malfunctioning relay, stuck module, or aftermarket accessory causing the draw.
To troubleshoot battery health, resolve parasitic drains, and protect against unexpected dead battery lockouts, keep these three top-rated tools in your vehicle setup:
| Essential Diagnostic Tool | Primary Function | Ideal For |
|---|---|---|
| Digital Car Battery Load Tester and Cranking Analyzer | Microprocessor-based conductance testing measuring Cold Cranking Amps (CCA), internal resistance, and cranking/charging waveforms. | Verifying true battery life, diagnosing weak starters, and testing alternator diode ripple. |
| Automatic Smart Pulse Repair Battery Charger and Maintainer | Multi-stage intelligent trickle charging with automatic thermal compensation and pulse desulfation recovery. | Restoring deeply discharged AGM/Gel/Lead-acid batteries and maintaining seasonal vehicles. |
| Portable Heavy Duty Car Emergency Jump Starter Power Bank | High-amperage lithium booster pack with integrated spark-proof smart clamps and reverse polarity protection. | Instant roadside emergency starting without needing a second vehicle or traditional jumper cables. |
Automotive electrical instability frequently triggers secondary symptoms across heating, cooling, and safety networks. Follow these related guides to close your diagnostic loop:
Stop guessing whether your issue is a dead battery, a failing alternator, or a hidden parasitic drain. Input your vehicle’s specific symptoms, engine cranking behavior, and dashboard indicators into the DriveSolve Car Diagnostic Navigator to receive a tailored electrical health report, step-by-step testing paths, and verified DIY repair sequences instantly.
In moderate climates, high-quality lead-acid and AGM batteries last 3 to 5 years. However, in regions with extreme summer temperatures (such as the UAE and GCC), high heat accelerates internal water evaporation and positive plate corrosion, reducing typical battery lifespan to 2 to 3 years. Regular conductance testing helps identify failing cells before complete roadside breakdown.