- Need Diagnostic Guidance? Call Desk: +971 55 639 9463
- Expert Support: 8:00 AM – 10:00 PM (GST)


Never fill an empty cooling system by simply pouring coolant into the radiator neck and letting the engine run with the cap off. Modern engine blocks feature complex internal reverse-flow channels that trap air pockets around the cylinder head. These "air locks" prevent coolant from touching the temperature sensor—meaning your gauge will read normal while the cylinder head is literally warping from localized extreme heat. Always use a vacuum refill tool or open factory air bleeders to burp the system completely.
When multiple dashboard indicators illuminate simultaneously or a check engine light appears and disappears without a noticeable change in engine performance drivers are often left stranded between expensive dealership diagnostic quotes and complete uncertainty. Understanding modern vehicle intelligence and diagnostic telemetry is the single most effective way to protect your vehicle, verify repair quotes, and fix underlying electronic faults before they cause severe mechanical failure.
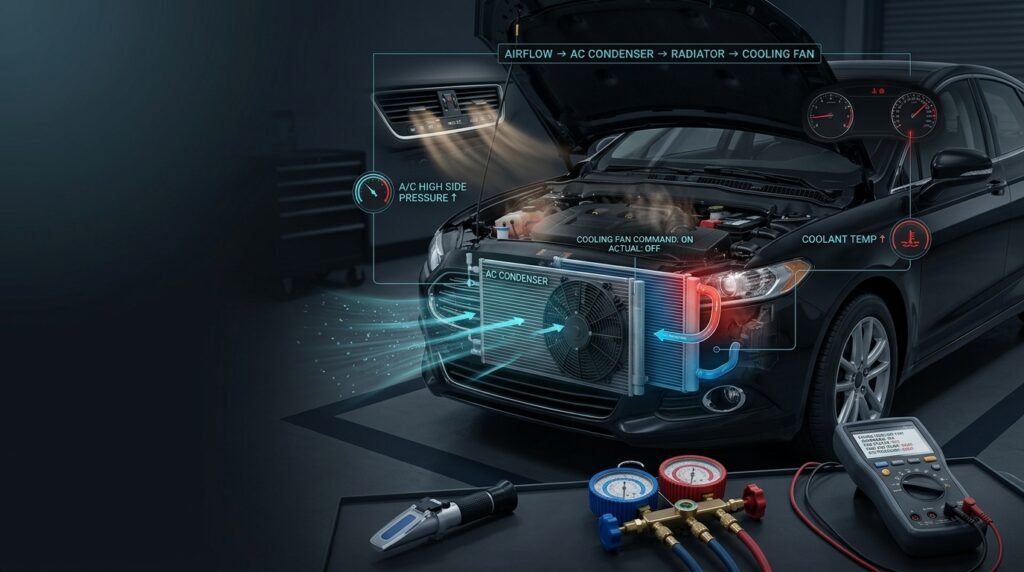
Ambient air first flows through the AC Condenser, where it removes heat from the refrigerant. The air then passes through the Engine Radiator, where it removes heat from the engine coolant. Finally, the Electric Radiator Fan helps maintain airflow through the radiator, especially when the vehicle is stationary or airflow is low.
The AC Condenser sits directly in front of the engine radiator. If road debris, bent fins, or dirt block this airflow, your AC high-side pressure spikes and the compressor shuts off to prevent catastrophic damage.
The Cooling Fan pulls ambient air through both heat exchangers. If the fan motor fails or the relay burns out, your AC will blow ice-cold on the highway (natural airflow) but turn boiling hot the second you stop at a traffic light—followed shortly by the engine temperature rising.
Before tearing into your dashboard, running your symptoms through the DriveSolve Car Diagnostic Navigator will cross-reference your specific vehicle make and model against known thermal failure points and active OBD-II codes (such as P0217 for engine over-temperature or P0532 for AC refrigerant pressure sensor low).
Step 1: Check the AC Compressor Clutch Engagement
Start the engine, set the AC to maximum cold, and set the blower fan to high. Open the hood and look down at the front of the AC compressor pulley.
The Outer Hub is Spinning: The compressor clutch is actively engaged. If air is still warm, the issue is an internal blend door actuator, low/high refrigerant charge, or an expansion valve blockage.
The Center Hub is Stationary (Clicking Rapidly or Silent): The ECU is refusing to engage the compressor. This is typically triggered by an electrical open circuit, a blown fuse/relay, or low refrigerant pressure that trips the safety pressure cutoff switch.
Step 2: Measure Static & Running Pressures on the High/Low Ports
Guessing your refrigerant charge with a cheap single-gauge can is the fastest way to blow out compressor seals. You need real pressure readings on both sides.
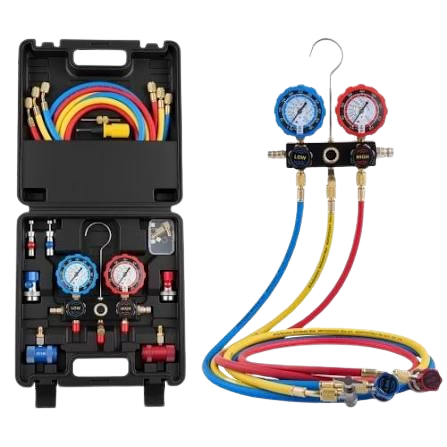
Connect a professional R134a AC Diagnostic Manifold Gauge Set to the low-pressure (blue) and high-pressure (red) service ports with the engine running at 1,500 RPM:
Normal Operating Window (at 30°C–35°C ambient): Low side should read 28–35 PSI; High side should read 175–225 PSI.
Both Sides Equal (60–80 PSI running): The compressor is not pumping internally or the scroll control valve has failed.
Low Side Near Zero / Vacuum: Massive moisture freeze or blocked thermal expansion valve (TXV).
High Side Spiking Above 325 PSI: Inadequate condenser airflow, dead cooling fan, or extreme refrigerant overcharge.
Step 3: Test Coolant Boiling Point & Chemical Integrity
Water cools better than pure glycol, but pure water boils at 100°C and corrodes internal aluminum channels. An improper 50/50 mix lowers the boiling point under pressure, causing flash-boiling and vapor pockets that lock up cooling passages.
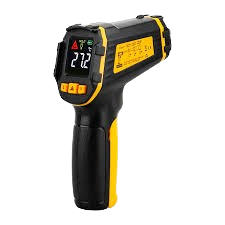
Take a single drop of fluid from the expansion reservoir and place it on a Handheld Optical Antifreeze & Coolant Refractometer Tester.
Verify your freezing point protection level reads -37°C and the boiling point exceeds 128°C under a standard 15 PSI radiator cap.
If the fluid is cloudy, rust-tinted, or shows pH degradation, the cooling channels are restricting heat dissipation.
Step 4: Pressure Test the Radiator Loop for Hidden Micro-Leaks
If you find yourself constantly topping off the coolant reservoir but cannot spot a puddle under the car, the coolant is evaporating onto hot exhaust headers or seeping into combustion chambers through a weeping head gasket.
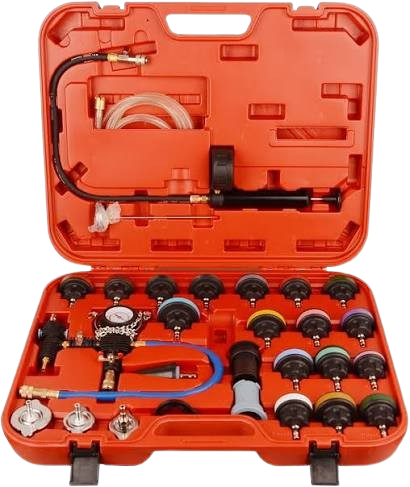
Fit a [[Universal Cooling System Radiator Pressure Tester & Vacuum Purge Kit]] to the radiator neck or coolant bottle. Pump the hand gauge to the pressure rating stamped on your radiator cap (usually 1.1 bar / 16 PSI) with the engine cold and turned off:
Pressure Holds Steady for 15 Minutes: The hydraulic cooling circuit is airtight.
Pressure Drops with No Visible External Puddle: Inspect the heater core under the front passenger carpet or perform a combustion block leak test to check for head gasket breach.
| Essential Diagnostic Tool | Primary Function | Ideal For |
|---|---|---|
| R134a AC Diagnostic Manifold Gauge Set | Dual-gauge pressure analysis of low-side suction and high-side compression circuits. | Diagnosing weak compressors, detecting refrigerant leaks, and preventing system overcharging. |
| Handheld Optical Antifreeze & Coolant Refractometer Tester | Precision optical measurement of ethylene/propylene glycol concentration and freeze/boil thresholds. | Verifying exact 50/50 coolant mix ratio, battery acid density, and fluid degradation. |
| Universal Cooling System Radiator Pressure Tester & Vacuum Purge Kit | Pressurizes cooling loops to expose pinhole leaks and refills coolant under vacuum without air bubbles. | Finding hidden hose/radiator leaks and eliminating air locks during cooling system flushes. |
Automotive cooling and climate control issues often stem from interconnected electrical or engine performance faults. Follow these targeted guides to complete your diagnostic loop:
Suspecting an electrical issue with your fan relay or climate control ECU? Read our detailed walkthrough on How to Test Alternator Voltage Ripple & Ground Resistance
Seeing multi-system warning lights or experiencing idle drops when the AC turns on? Explore our guide on Decoding Modern Vehicle Warning Lights: Ghost Faults & Voltage Drops
Experiencing engine sputtering or loss of power when the cooling system heats up? Jump into our Engine Misfire Diagnostic Guide (P0300 to P0308)
Don’t let repair shops charge you for parts you don’t need. Input your vehicle’s specific symptoms, engine behavior, and trouble codes into the DriveSolve Car Diagnostic Navigator to receive a tailored mechanical health report, probable component failure points, and exact DIY repair paths in seconds.